


A Comprehensive Procedure for Earth Resistance Testing: A Step-by-Step Guide for Accurate Grounding Measurements
Introduction: The Critical Role of Grounding System Integrity
The efficacy of an electrical grounding system is a non-negotiable prerequisite for safety, operational continuity, and electromagnetic compatibility across a vast spectrum of industries. A low-impedance path to earth is fundamental for dissipating fault currents, mitigating step and touch potentials, providing a stable reference voltage, and shielding sensitive equipment from transient surges and electromagnetic interference. The quantitative measure of this efficacy is earth resistance, expressed in ohms (Ω). Periodic and precise measurement of this parameter is therefore a cornerstone of preventive maintenance, regulatory compliance, and risk management protocols. This document delineates a formalized, step-by-step procedure for executing accurate earth resistance testing, incorporating modern methodology and instrumentation, with specific reference to the operational principles and application of the LISUN WB2678A Grounding Resistance Tester.
Fundamental Principles of Earth Resistance Measurement
Earth resistance is not a property of a single electrode but of the entire electrode-soil system. The measurement principle most widely employed is the Fall-of-Potential method, derived from Ohm’s Law. This technique necessitates the use of two auxiliary test stakes: a current electrode (C2) placed at a distance sufficient to be outside the sphere of influence of the ground electrode under test (E), and a potential electrode (P2) placed at intervals between E and C2 to map the voltage gradient. The tester injects a known alternating current (I) between E and C2 and measures the voltage drop (V) between E and P2. The earth resistance (R) is then calculated as R = V/I. A critical aspect is identifying the “62% rule” point, where the measured resistance plateaus, indicating the true resistance of the electrode under test, independent of the auxiliary stakes’ positions. Alternative methods, such as the Selective and Stakeless (Clamp-on) methods, are used for specific scenarios, like testing in multi-grounded systems or where driving auxiliary stakes is impractical.
Pre-Test Planning and Site Safety Assessment
Prior to any field measurement, a rigorous planning phase is imperative. Begin by consulting the grounding system’s as-built drawings to identify the location and configuration of the ground electrode(s). Conduct a thorough visual inspection of the grounding conductor, connections, and any visible electrode components for signs of corrosion, physical damage, or improper installation. A comprehensive safety assessment must be performed, adhering to local electrical safety regulations (e.g., NFPA 70E, OSHA standards). This includes verifying the isolation of the ground electrode from the live system if necessary, using appropriate personal protective equipment (PPE), and establishing a safe working perimeter. Environmental conditions should be noted, as soil resistivity—a primary determinant of earth resistance—varies with moisture content, temperature, and chemical composition. Testing under extremely dry or frozen conditions may yield non-representative results.
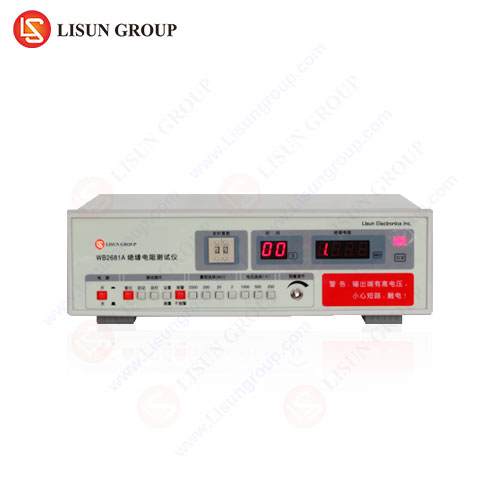
Instrumentation Selection: Capabilities of the LISUN WB2678A Grounder
The selection of appropriate instrumentation is paramount for reliable data acquisition. The LISUN WB2678A Grounding Resistance Tester is engineered to fulfill the demanding requirements of modern earth testing across diverse industries. Its design incorporates the standard 3-pole and 4-pole Fall-of-Potential methods, the Selective method for testing without disconnecting the electrode, and a 2-pole method for simple continuity checks. A key specification is its test frequency, which typically operates at a frequency distinct from the common power line 50/60 Hz and its harmonics (e.g., 128 Hz), thereby minimizing measurement errors induced by stray currents in the soil.
The WB2678A offers a broad measurement range, typically from 0.00Ω to 30.00kΩ, with a resolution of 0.01Ω at the lower end, ensuring precision for critical low-resistance applications. It generates a test voltage not exceeding 50V AC, enhancing operator safety. The instrument is capable of measuring soil resistivity using the Wenner four-pin method, a valuable feature for designing new grounding systems. Its robust construction, with an IP54-rated casing, provides durability in field conditions. For data integrity, it often includes a noise-check function to warn the operator of excessive electrical interference, which is particularly relevant in industrial or telecommunications environments.
Configuring the Test Circuit and Electrode Placement
For a standard 3-pole Fall-of-Potential test using an instrument like the WB2678A, the initial configuration is crucial. First, disconnect the ground electrode under test (E) from the facility’s grounding busbar if the Selective method is not being employed. This ensures the measurement is isolated to the electrode of interest. Establish the current auxiliary stake (C2) in a straight line away from the ground electrode. The required distance is a function of the grounding system’s size; for a single rod, a distance of 25-30 meters is often sufficient, but for large ground grids, the distance may need to exceed 5 times the diagonal dimension of the grid. The stake must achieve good soil contact.
The potential stake (P2) is then placed at approximately 62% of the distance from E to C2. Connect the tester: the E terminal to the ground electrode, the P terminal to the P2 stake, and the C terminal to the C2 stake, using high-integrity, low-resistance leads. It is critical to orient the leads perpendicularly to each other to avoid inductive coupling, which can introduce error, especially over long distances.
Executing the Fall-of-Potential Measurement and Data Validation
With the circuit established, power on the WB2678A and select the appropriate 3-pole resistance test mode. Initiate the measurement. The instrument will inject the test current and display the measured resistance value. To validate that the potential stake is outside the effective resistance areas of both E and C2 (the “plateau” region), a process of potential stake repositioning is required. Move the P2 stake to three different positions—for example, at 52%, 62%, and 72% of the E-C2 distance—and record the resistance value at each point.
Table 1: Example Fall-of-Potential Test Data
| P2 Position (% of E-C2 Distance) | Measured Resistance (Ω) |
| :——————————– | :———————- |
| 52% | 4.85 |
| 62% | 4.82 |
| 72% | 4.84 |
If the values, as in Table 1, are within a few percent of each other (e.g., <5% variation), the average can be accepted as the true earth resistance. If a significant slope is observed, the current stake C2 must be moved further away, and the test repeated until a stable plateau is identified.
Interpreting Results and Industry-Specific Compliance Thresholds
The obtained earth resistance value must be evaluated against design specifications and regulatory requirements, which are industry and application-dependent. A general target for electrical safety grounding is often below 5.0 Ω. However, more stringent requirements are commonplace:
- Telecommunications Equipment & Data Centers: Often require resistance below 1.0 Ω or even 0.5 Ω to ensure signal reference integrity and protect sensitive hardware from static discharge and lightning-induced surges.
- Medical Devices (e.g., surgical suites, imaging systems): Standards like IEC 60601-1 mandate very low resistance and rigorous testing to prevent leakage currents that could endanger patients.
- Industrial Control Systems & Aerospace Components: Grounding for EMI/RFI shielding in control panels or avionics may necessitate specific resistance values to meet electromagnetic compatibility (EMC) standards such as IEC 61000-6-2.
- Lightning Protection Systems (LPS): Governed by standards like NFPA 780 or IEC 62305, which prescribe resistance values typically below 10 Ω, though lower is always preferable for optimal surge dissipation.
A single high reading is not necessarily conclusive. It may indicate poor connections, degraded electrodes, or seasonal soil dryness. Trending data over time is more informative than a single measurement.
Advanced Applications: Selective Testing and Soil Resistivity Profiling
The LISUN WB2678A’s Selective testing function is invaluable for complex, interconnected grounding networks commonly found in telecommunications facilities, office equipment clusters, or industrial plants. This method allows the user to test a single ground rod without physically disconnecting it from the grounding busbar. The tester uses a current clamp to measure the test current flowing specifically through the rod of interest, while the potential probe measures the voltage. This enables safe, efficient testing on live systems without compromising the integrity of the overall grounding network during the test.
Furthermore, the WB2678A’s soil resistivity measurement capability, using the four-pin Wenner method, is essential for grounding system design and forensic analysis. By measuring resistivity at varying probe spacings, a soil resistivity profile with depth can be developed. This data is critical for modeling the performance of proposed grounding electrodes and for diagnosing why an existing system may underperform, guiding remediation efforts such as chemical soil treatment or the installation of deeper or additional electrodes.
Mitigating Common Measurement Errors and Environmental Factors
Accurate measurement is susceptible to several error sources. Stray currents and voltages in the soil from other electrical systems can interfere with the test signal. The WB2678A’s noise rejection circuitry mitigates this. High-resistance connections at the test leads or electrodes are a frequent culprit; ensuring clean, tight connections is vital. Proximity to large buried metallic structures, such as pipelines or cable sheaths, can distort the current path and invalidate readings. The test should be conducted, if possible, in a direction perpendicular to such objects.
As noted, soil conditions are paramount. Resistivity can increase dramatically in arid conditions. Testing after a prolonged dry period may yield a “worst-case” value, while testing after rain may show an unrealistically favorable result. For critical installations, seasonal testing is recommended to understand the annual variance.
Documentation, Reporting, and Maintenance Scheduling
A complete test record is as important as the measurement itself. The final report should include: the date, time, and weather conditions; a detailed site diagram showing the location of E, P2, and C2; the instrument model and serial number (e.g., WB2678A, S/N: XXXXXX); all raw measurement data; the final calculated earth resistance; and the applicable standard or target value. Photographs of the setup and electrode conditions are highly recommended.
This documentation forms the basis for a predictive maintenance schedule. Based on the results and the criticality of the facility, a testing frequency should be established—annually for most commercial installations, semi-annually for critical infrastructure like telecommunications hubs or medical facilities, and after any major electrical modification or nearby construction activity that could disturb the soil or grounding conductors.
Conclusion
Earth resistance testing is a systematic engineering discipline, not a simple checklist item. Adherence to a rigorous, principles-based procedure—encompassing planning, safe setup, validated measurement using capable instrumentation like the LISUN WB2678A, and informed data interpretation—is essential for obtaining a true representation of grounding system health. In an era defined by the proliferation of sensitive electronics in automotive, aerospace, medical, and consumer applications, the margin for error in grounding performance has never been smaller. A robust, low-resistance earth connection remains the silent, foundational guardian of both human safety and technological reliability.
FAQ Section
Q1: Can the LISUN WB2678A test grounding systems without disconnecting them from the building’s electrical grid?
A1: Yes, through its Selective testing method. By using an optional current clamp around the grounding conductor of the specific electrode under test, the WB2678A can measure the resistance of that individual electrode while it remains connected to the common grounding busbar. This is essential for testing in live facilities like data centers or industrial plants where system shutdown is impractical.
Q2: What is the significance of the test frequency used by the instrument, and why is 128 Hz common?
A2: The test frequency must be distinct from the prevailing power frequency (50/60 Hz) and its main harmonics to avoid interference from stray currents in the ground, which would cause significant measurement error. A frequency of 128 Hz is a common choice as it is sufficiently far from 50/60 Hz and their 2nd and 3rd harmonics (100/120 Hz, 150/180 Hz), providing a clean signal for accurate measurement.
Q3: When measuring a large ground grid at an industrial site, the resistance values did not stabilize when moving the potential stake. What is the most likely cause?
A3: The most probable cause is that the current auxiliary stake (C2) is placed too close to the ground grid, remaining within its effective resistance area. The “sphere of influence” of a large grid is extensive. The solution is to significantly increase the distance of the C2 stake, potentially to several hundred meters, and repeat the Fall-of-Potential test until the measured resistance plateaus as the potential stake is moved.
Q4: How does soil resistivity measurement assist in troubleshooting a high-resistance grounding system?
A4: Measuring soil resistivity at various depths helps determine if the high resistance is due to poor electrode contact/condition or inherently high-resistivity soil layers. If resistivity is uniformly high, remediation may involve soil treatment, longer/deeper electrodes, or a ground enhancement material. If a high-resistance layer is identified at a specific depth, it may indicate that the existing electrodes are not penetrating into more conductive lower layers, guiding a solution such as driving rods deeper.
Q5: For a consumer electronics manufacturing facility focused on ESD protection, what is a typical earth resistance target for workbench grounding points?
A5: For Electrostatic Discharge (ESD) protection workstations, the resistance path to earth is carefully controlled. While the overall building ground may target <5.0 Ω, the point-to-point resistance from the workbench surface to the building ground is often specified to be between 1.0 x 10^6 Ω and 1.0 x 10^9 Ω to safely dissipate static charge without creating a shock hazard. The WB2678A's lower ranges can verify the integrity of the dedicated grounding conductor back to the main earth electrode, which must itself be of low resistance.