


A Comprehensive Methodology for Ground Resistance Measurement in Modern Electrical Systems
Introduction to Grounding System Integrity
The efficacy of any electrical installation’s protective grounding system is fundamentally contingent upon the impedance of the earth electrode subsystem. This impedance, commonly termed ground resistance, represents the aggregate opposition to current flow between an electrode and the surrounding earth mass. Low ground resistance is a non-negotiable prerequisite for ensuring personnel safety, safeguarding equipment from fault currents and transient overvoltages, and guaranteeing the stable reference potential required for the reliable operation of sensitive electronic apparatus. Inadequate grounding can precipitate catastrophic failures, including insulation breakdown, data corruption in digital systems, and, most critically, the failure to clear faults, thereby elevating shock and fire hazards. Consequently, the precise and periodic measurement of ground resistance is a mandated practice across global electrical codes and standards, including IEC 60364, IEEE 81, and NFPA 70 (National Electrical Code).
This guide delineates a rigorous, step-by-step methodology for performing ground resistance measurements, with particular emphasis on the application of modern fall-of-potential testing techniques. It further examines the instrumental role of advanced test equipment, such as the LISUN WB2678A Grounding Resistance Tester, in achieving accurate, repeatable, and compliant results across diverse industrial and commercial environments.
Fundamental Principles of Earth Electrode Testing
The theoretical underpinning of most ground resistance measurements is the fall-of-potential method, a derivative of the four-terminal resistance measurement principle adapted for earth-coupled systems. The methodology involves injecting a known alternating current (I) between the electrode under test (E) and a remote current probe (C). A separate potential probe (P) is then driven into the soil at varying distances along a straight line between E and C. The voltage (V) between E and P is measured. According to Ohm’s Law (R = V/I), the ground resistance is calculated. The objective is to position P within the “effective resistance area” of E, while ensuring C is sufficiently distant to be outside both E’s and P’s spheres of influence, typically at a distance of 5 to 10 times the major diagonal of the electrode system.
Alternative methods, such as the selective or clamp-on testing techniques, are employed for specific scenarios, like testing in multi-grounded systems without disconnection. However, the fall-of-potential method remains the benchmark for definitive, standalone electrode evaluation due to its direct derivation from first principles.
Pre-Test Planning and Site Safety Assessment
Prior to any field measurement, comprehensive planning is imperative. Begin by consulting the site’s grounding system single-line diagrams to identify all electrodes, bonding connections, and metallic paths. Physically locate the test electrode. A critical safety step is to verify the absence of any unknown or stray voltages on the grounding conductor using a high-impedance voltage detector. The presence of induced AC voltages or DC offsets from cathodic protection systems can invalidate readings and pose safety risks to personnel and instrumentation.
Determine the approximate required distance for the current probe (C). For a single driven rod, a distance of 25 to 30 meters is often a practical starting point. For large ground grids at substations or telecommunications centers, this distance may extend beyond 100 meters. Ensure the proposed path for the test leads is clear of underground utilities, which can be located using appropriate detection services. All test personnel must adhere to relevant personal protective equipment (PPE) and safe work practices for electrical testing.
Instrument Configuration and Initial Verification
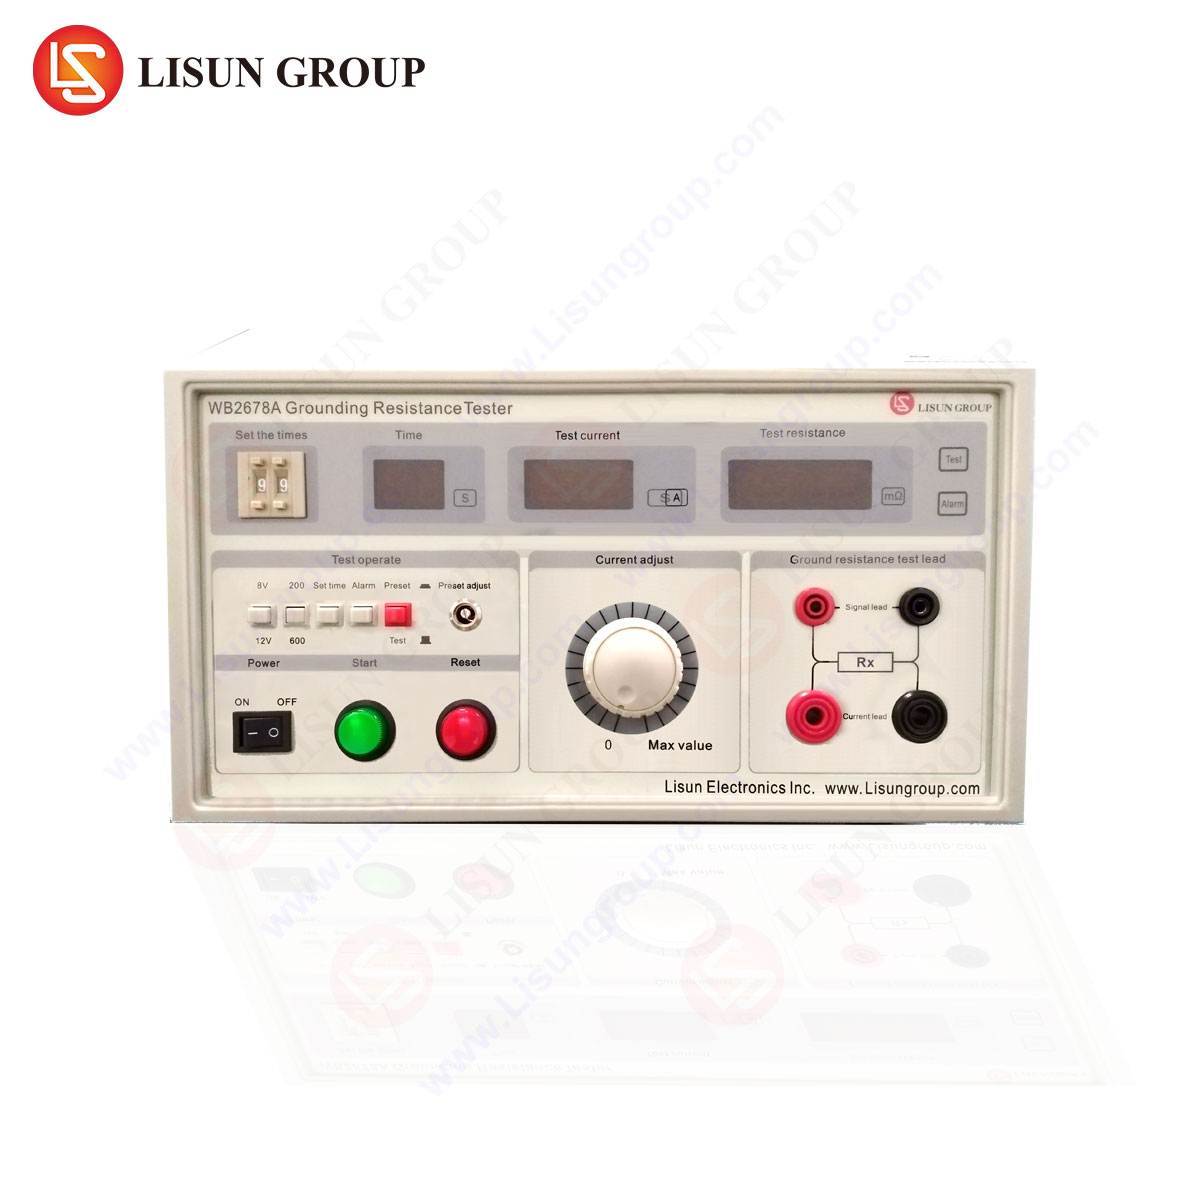
Select a tester whose specifications align with the test requirements. For this procedure, we consider the capabilities of the LISUN WB2678A Grounding Resistance Tester. This instrument integrates a precision test frequency generator, synchronized voltage and current measurement circuits, and digital signal processing to reject interference. Key specifications relevant to this methodology include a ground resistance measurement range from 0.00Ω to 30.00kΩ, a test frequency selectable between 94Hz, 105Hz, 111Hz, and 128Hz (to avoid power-line harmonic interference), and a maximum open-circuit test voltage of 50V AC for operator safety.
Before connection, perform a confidence check on the instrument. This can involve a simple three-point verification: a short-circuit test (leads E and P shorted together, expecting a reading near 0.00Ω), an open-circuit test (leads disconnected, expecting an over-range indication), and a test using a known reference resistor, if available. Ensure the instrument batteries are sufficiently charged, as low voltage can affect accuracy.
Probe Placement and Fall-of-Potential Curve Acquisition
With the instrument powered off, connect the test leads. The cable from terminal E (or H) connects directly to the electrode under test. The potential lead (terminal P or S) connects to the potential probe rod, and the current lead (terminal C or ES) connects to the current probe rod. Using insulated stakes, drive the P and C rods into the earth to a depth ensuring good soil contact, typically 20-30 cm. The three points—E, P, and C—must form a straight line.
Initiate the test with probe P at a distance of approximately 20% of the distance to C. Record the resistance value. Move P to a new location, at increments of 10% of the E-C distance, recording the resistance at each point. A minimum of five data points is recommended. This process generates a curve of resistance versus probe spacing.
Interpreting the Resistance Curve and Determining True Rg
The plotted data should form a characteristic plateau region. The “true” ground resistance (Rg) of the electrode is defined as the value within this flat zone, where further increases in the P-probe distance yield negligible change in the measured resistance. This indicates that P is positioned in the zone of negligible potential gradient caused by the test current, reflecting the true impedance of the E electrode to “remote earth.”
If the curve shows a continual rise or lacks a clear plateau, the current probe C is likely still within the mutual influence zone of the electrode system. The test must be repeated with C placed at a greater distance. Modern testers like the LISUN WB2678A often include an automatic graphing or calculation function to assist in identifying this plateau, reducing interpretation subjectivity.
Documentation and Compliance with Industry Standards
Every measurement must be meticulously documented. The record should include: the test date and time; weather conditions and recent precipitation (affecting soil resistivity); a sketch of the electrode system and probe layout; the final Rg value; the instrument model and serial number (e.g., WB2678A, S/N: XXXXXX); and the applicable standard used (e.g., “Test performed per IEEE Std 81-2012”). This documentation is essential for compliance audits, trend analysis over time, and forensic investigation following an equipment failure.
Acceptable resistance values are dictated by application-specific standards. For example, telecommunications tower grounding may require <5Ω, while residential service entrances might permit <25Ω. The measured value must be compared against the design specification and regulatory requirement for the asset in question.
Application of the WB2678A in Cross-Industry Scenarios
The LISUN WB2678A Grounding Resistance Tester is engineered to address the nuanced demands of various sectors. Its selectable test frequencies are crucial in electrically noisy environments. In Industrial Control Systems and Automotive Electronics test facilities, where variable-frequency drives and high-power machinery generate substantial electromagnetic interference (EMI), using a non-50/60Hz test signal (e.g., 111Hz) allows the instrument’s phase-locked detection to filter out noise, yielding stable readings.
For Medical Devices manufacturing and Aerospace and Aviation Components testing, the instrument’s high resolution (0.01Ω) and accuracy (±(2%+3 digits)) are critical. The grounding integrity of an MRI suite’s Faraday cage or an avionics bay’s ground plane must be verified to extreme precision to prevent micro-shocks or ensure electromagnetic compatibility (EMC). The WB2678A’s ability to measure both resistance and soil resistivity (via the Wenner four-pin method) also aids in the initial design and periodic validation of grounding systems for Telecommunications Equipment shelters and Lighting Fixtures for outdoor stadiums, where soil conditions can vary seasonally.
The clamp-on accessory compatibility (where applicable) enables selective testing without disconnecting the ground. This is invaluable for facility managers assessing the integrity of bonded networks in Office Equipment data centers or Consumer Electronics production lines, where system downtime must be minimized.
Mitigating Common Measurement Errors and Pitfalls
Several systematic errors can compromise data integrity. Probe proximity error occurs if C is too close, distorting the potential field. Stray current and voltage interference from nearby power systems can be mitigated by using the WB2678A’s frequency selection and its built-in noise monitoring function, which alerts the operator if ambient interference exceeds a threshold. High soil resistivity, often encountered in rocky or sandy terrain, can lead to poor probe contact. In such cases, watering the area around the probes with a saltwater solution (not near the electrode under test) can temporarily improve contact. Lead resistance is negated by the four-terminal design of the tester, which separates the high-current injection circuit from the high-impedance voltage sensing circuit.
Integrating Ground Resistance Data into Asset Management
Ground resistance measurement should not be an isolated event but integrated into a predictive maintenance (PdM) or reliability-centered maintenance (RCM) program. Trending Rg values over years can reveal the degradation of electrodes due to corrosion, loosening of connections, or changes in local soil moisture content. A gradual upward trend provides an early warning to schedule corrective actions—such as installing additional rods or applying ground enhancement material—before the system falls out of compliance. The data logging and PC interface capabilities of instruments like the WB2678A facilitate this longitudinal analysis, transforming a compliance task into a strategic asset management tool.
Conclusion
The accurate measurement of ground resistance is a cornerstone of electrical safety and system reliability. Adherence to a disciplined, principled methodology—encompassing planning, safe deployment, correct instrument use, and data interpretation—is essential. Utilizing advanced, purpose-built test equipment provides the accuracy, noise immunity, and operational features necessary to execute this methodology effectively across the vast spectrum of modern electrical and electronic applications. In an era defined by the proliferation of sensitive digital electronics and stringent safety regulations, the role of precise ground resistance verification has never been more critical.
FAQ Section
Q1: Can the LISUN WB2678A measure ground resistance without disconnecting the electrode from the building’s grounding system?
A1: For a definitive measurement of a specific electrode’s resistance using the fall-of-potential method, disconnection is typically required to isolate it from parallel paths. However, the WB2678A, when used with an optional clamp-on current sensor accessory, can perform selective or stake-less measurements on connected electrodes. This is useful for periodic checks and troubleshooting in live systems, though the reference method for acceptance testing usually involves disconnection.
Q2: What is the significance of the selectable test frequencies (94Hz, 105Hz, 111Hz, 128Hz)?
A2: Power distribution systems operate at 50Hz or 60Hz and generate harmonic noise. By injecting a test current at a frequency distinct from these and their prime harmonics, the instrument’s filtering circuitry can precisely distinguish the test signal from background electrical noise. This ensures stable and accurate readings in challenging environments like industrial plants or utility substations.
Q3: How often should ground resistance measurements be performed?
A3: The frequency is dictated by the criticality of the installation, local regulations, and environmental factors. Initial acceptance testing is mandatory. Periodic testing intervals commonly range from annually for critical infrastructure (telecom hubs, hospitals, chemical plants) to triennially for commercial buildings. More frequent testing is advised in corrosive soil conditions or after major electrical storms or ground disturbance events.
Q4: The measured resistance is above the required specification. What are the primary corrective actions?
A4: Corrective strategies focus on lowering the impedance path to earth. Common actions include: installing additional ground rods bonded to the existing system; using longer or deeper rods to reach lower resistivity soil layers; treating the soil around rods with ground enhancement materials (e.g., bentonite clay, conductive concrete); or installing a ground ring or grid to increase the surface area of the electrode system.